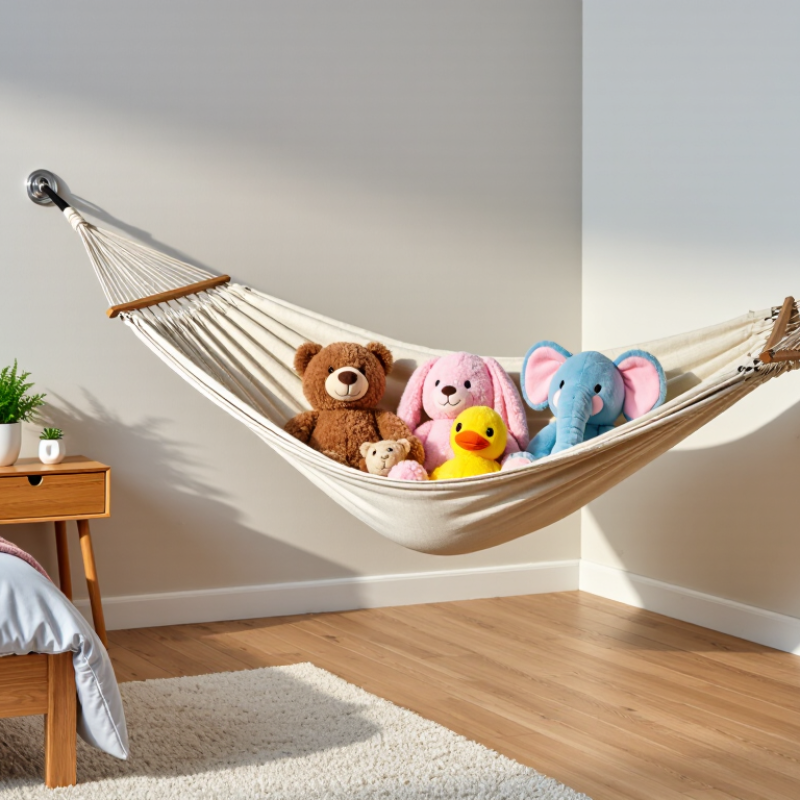
A plush toy hammock can turn an unused wall corner into a soft, visible home for favorite stuffed animals. This guide explains how to make a plush toy hammock for wall corner spaces using simple materials, careful measuring, and secure attachment points. The goal is practical: keep toys off the floor without hiding them in a crowded bin. A small corner above a bed or beside a reading chair can work well, provided the hammock stays clear of doors, walkways, and anything that could snag its fabric.
Sewing and home-organization specialist Nina Cole offers this project principle: “Measure the corner with the toys in mind, then build a hammock that supports their weight without pulling at the walls.” Keep that thought close. A hammock that looks roomy when empty may sag once loaded, so allow for stretch and leave enough slack for easy access. Soft cotton or sturdy knit fabric can suit lightweight plush toys; inspect seams and hanging hardware before use. Wall type matters, too. A fastener suitable for wood may not hold safely in drywall, so choose hardware rated for the surface and expected load.
The steps ahead cover measuring, cutting, sewing, and installation, with practical checks along the way. Start modestly. Test the finished hammock with a few toys before filling it. And be willing to adjust the shape; corners are rarely as square as they appear. A careful fit beats a perfect-looking plan.
Understanding the Design and Weight Needs of a Corner Plush Toy Hammock
A corner plush toy hammock must fit the space and carry its contents without pulling loose from the wall. Measure both walls, then check the hammock’s stretched width and depth; a sagging net can crowd a doorway or brush a shelf. Count the toys and weigh them together, including the net’s own weight.
For example, eight plush toys weighing 350 grams each add 2.8 kilograms. That is only the static load. Tossing toys in or tugging the net can briefly increase the force.
Choose mounting hardware for the wall material, not just the hammock fabric. A stud, masonry wall, and hollow drywall require different fixings.
The CPSC’s 2022 Toy-Related Deaths and Injuries report estimated 209,500 emergency-department-treated toy injuries among children aged 14 and younger. That figure does not measure hammock failures, but it supports keeping storage secure and toys accessible.
Set a conservative capacity above the measured load, and treat the weakest part—the anchors, stitching, or mesh—as the limit. This is not a certified load rating. I would test the empty hammock first, then add toys gradually near floor level. Recheck the corners after a few days. Knots can loosen; I might miss that on the first inspection.
Gathering Suitable Fabric, Fasteners, and Sewing Tools
Choose fabric that can carry a small load without stretching too much. A sturdy cotton canvas works well for the triangular outer panels, while breathable mesh lets plush toys remain visible. Check the fabric for thin spots and fraying edges. Soft jersey may look inviting, but it can sag under heavier toys. Test a small scrap first. I would not skip that step.
Gather matching polyester thread, fabric scissors, measuring tape, clips or pins, and a sewing machine with a suitable needle. A washable fabric is practical because the hammock may collect dust. Cut two matching panels, leaving about a half-inch seam allowance. Reinforce the corners with extra stitching; those points take much of the pull. Keep the seams even, though a tiny wobble is usually harmless.
For mounting, prepare three sturdy screw hooks and wall anchors rated for the wall material, or fasten into studs when possible. Avoid relying on small adhesive hooks for a loaded hammock. A drill, level, and stud finder can help; wear eye protection while drilling. Check the hook instructions and the wall surface before installing. Hang the empty hammock first, then add toys gradually and inspect the seams and fasteners. It is easy to underestimate the weight of a crowded corner.
Measuring and Cutting the Hammock Panels
Measure the corner from the point where the walls meet. Mark equal or different lengths along each wall, then measure between those marks for the front edge. For a square corner, a 40-centimeter reach on each wall creates a diagonal of about 57 centimeters. Check twice. Write down finished panel dimensions before cutting, and add seam allowance to every stitched edge. A 1.5-centimeter allowance is manageable for most home sewing machines.
Choose fabric only after checking its fiber content and care label. Textile Exchange’s 2024 Materials Market Report estimates polyester made up 57% of global fiber production in 2023. That figure describes the wider textile market, not hammock performance, but it shows why synthetic fabrics are common. Prewash the fabric as you plan to wash the finished hammock, let it dry, and measure again. Use the changed dimensions to adjust your pattern; shrinkage varies by fabric and finish. I once skipped this step on a small project. The edge came up short.
Fold the fabric with its right sides together if you are sewing two matching panels. Pin the paper pattern, keep the grain straight, and cut slowly around the front curve or diagonal. Leave extra fabric where the hammock will attach to the wall. A few centimeters of allowance can help form a reinforced pocket or casing, but test the fold against your chosen fastener before trimming.
Sewing the Net and Reinforcing Its Hanging Corners
Cut the net from stable mesh or woven fabric, then finish every raw edge with a narrow double-fold hem. Keep the openings small enough that toy limbs cannot slip through. I learned this the annoying way: one loose edge caught a plush ear during a test. It was fixable, but avoidable.
Gather the net into a soft triangle, leaving enough fabric for a shallow dip. Fold each corner over itself and enclose a short length of strong webbing inside the fold. Sew a box with an X through each corner; add a second row of stitching near the edge. Use polyester thread and a fresh needle suited to the fabric. Textile Exchange’s 2024 Materials Market Report estimates global fiber production reached 124 million tonnes in 2023, with about 87% from fossil-based sources. That figure describes supply, not fabric strength, so test your chosen material rather than trusting its label.
Test the seams before hanging the hammock. Add plush toys gradually, then check for skipped stitches, stretching, or puckering at each corner. Tug gently in several directions. If the net pulls unevenly, redistribute the fabric and reinforce the weakest corner. My first X-stitch was slightly crooked. It still held, but neat stitching makes wear easier to spot later. Tie each corner to a secure support, and keep the hammock clear of sharp wall edges.
Mounting the Hammock and Testing Its Stability
After choosing the corner height, mark both attachment points at the same level. Find a wall stud at each point, or use anchors rated for the wall material and expected load. Drywall alone can crumble under repeated pulling. The USDA Forest Products Laboratory’s Wood Handbook presents screw-withdrawal data by wood specific gravity, screw diameter, and penetration depth. That matters: a hook’s advertised capacity is not automatically the capacity of your wall assembly. Check the hardware rating and installation instructions, and leave room for the fabric to stretch without rubbing the floor or nearby furniture.
Hang the empty hammock and tug each corner gently. Then add plush toys in small batches, spreading them across the net rather than piling them in the center. Pause and inspect the hooks, fabric loops, and wall surface after every batch. Look for widening holes, a tilted hook, creaking, or new stitching gaps. Stop if anything shifts. A simple luggage scale can help you record the test load, but it does not replace the anchor’s stated limits. I check it twice. Perhaps that is cautious.
Keep the test controlled: no jumping, swinging, or letting a child hang from the net. Once loaded, leave it briefly and check again for sagging or loosened hardware. Remove some toys if the hammock pulls sharply on either corner. My first setup needed a small height adjustment; that was easy to miss until the toys settled. Recheck the mount after moving the hammock or changing its load.
Mounting the Hammock: Stability Test
Illustrative example readings show how much a wall anchor shifts as plush-toy load increases.
In this example, anchor movement rises gradually from 0.2 mm at 2 kg to 2.3 mm at 12 kg. Check that the anchors remain secure during loading; results vary with wall material and mounting hardware.
Conclusion
This guide explains how to make a plush toy hammock for wall corner by starting with the space available and the weight the finished hammock will need to hold. Choose sturdy, flexible fabric, suitable fasteners, and basic sewing tools. Measure the corner carefully, allowing enough room for the hammock to form a secure pocket, then cut the panels to match your measurements.
Sew the panels into a supportive net or pouch, and reinforce each hanging corner with strong stitching so the weight is distributed evenly. Attach the hammock to secure points on both walls, keeping it level and away from obstacles. Before adding toys, test the installation gently and check that the fabric, seams, and fasteners remain stable.

 Ottoman Toys